A soft amber glow washes over the garden as the first fireflies dance, and a tiny teepee flickers with hidden phosphorescence while kids settle in for a night of whispered stories.
This guide serves up seven kid‑friendly minimalist gear layouts, each paired with a starry‑night vibe that feels fresh for 2027 and ready for a quick backyard makeover.
- Easiest for beginners: Glow-In-The-Dark Teepee Tent for Tiny Explorers
- Most dramatic: Minimalist Star-Projector Pillow Fort
- Best for compact spaces: Compact Pop-Up Bunk with Monochrome Stripes
- Ultimate chill zone: Sleek Canvas Hammock Nest with Fairy‑Light Canopy
Pick one, grab a few budget swaps, and let the night sky come home.
1. Glow-In-The-Dark Teepee Tent for Tiny Explorers
Picture a tiny neon‑glow teepee perched on the grass, its walls shimmering as the sun dips and the backyard transforms into a secret galaxy for the little adventurers.
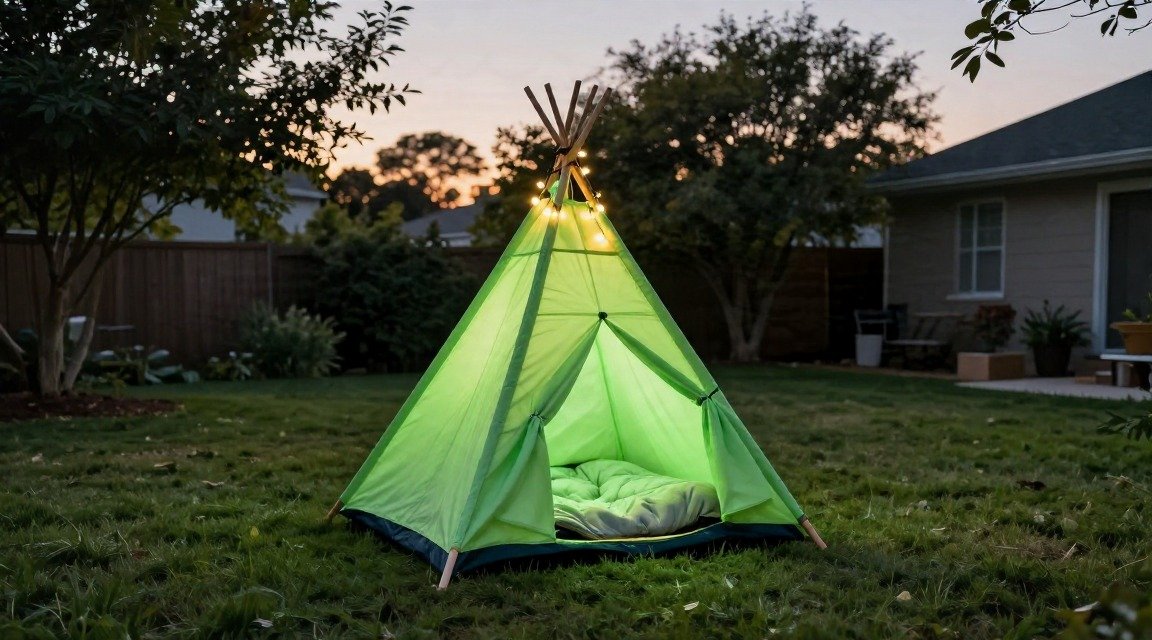
Best for: kids ages 4‑7, birthday‑party sleepovers, beginner‑level setup, compact backyard corner.
How to Build the Tent
The pole frame snaps together in under 15 minutes, creating a sturdy yet airy silhouette.
- Lay out four flexible wooden poles in a square and connect the tops with a lightweight rope hub.
- Slide the glow‑in‑the‑dark fabric panels over each pole, securing them with simple Velcro loops.
- Anchor the base with a few garden stakes or sandbags to keep the teepee steady on windy evenings.
- Place a plush sleeping bag inside, letting the glow wash over the soft folds.
Add a Personal Glow Touch
Turn the teepee into a personal star‑field with a few easy accents.
- Clip battery‑operated firefly‑style LEDs along the interior rim for twinkling sparkle.
- Hang a small bundle of fairy‑light strands from the top rope for a cascading glow.
- Choose a sleeping bag in a pastel hue that catches the neon light, adding a cozy contrast.
Budget Swap
If the specialty fabric feels pricey, repurpose a plain canvas tent and line the seams with reflective tape. The tape catches even the faintest LED glow, mimicking the same neon vibe without the extra cost.
Pro tip: tuck a scented lavender sachet inside the tent for a calming aroma that pairs perfectly with the starry‑night vibe.
2. Sleek Canvas Hammock Nest with Fairy-Light Canopy
Picture a soft canvas hammock swaying gently between two sturdy pines, its silhouette framed by a cascade of twinkling fairy lights that turn the yard into a private night‑sky lounge.
Best for: older kids (8‑12), moderate DIY skill, backyard or patio with two anchor points.
Key Pieces & Placement
The look hinges on three simple components: a breathable canvas hammock, natural‑fiber rope ties, and a draped fairy‑light canopy. Hang the hammock about 3‑4 feet off the ground, centered under a low‑branch tree or a sturdy pergola beam. Drape the lights from one side of the hammock to the other, letting them spill over the edges for a soft, ambient glow.
- Canvas hammock (neutral sand or muted teal)
- Twisted jute or cotton rope (8‑10 ft, weather‑treated)
- Battery‑operated fairy lights (warm white, 30‑ft strand)
- Two sturdy anchor points (tree, post, or metal brackets)
Make It Your Own
Swap the classic white lights for a pastel amber hue to echo a sunrise vibe, or wrap the rope ties with a thin strip of reflective tape for a subtle shimmer after dark. Add a few plush throw pillows in a contrasting navy or mustard to invite cozy snuggles, and tuck a small portable speaker for a low‑key soundtrack of crickets or soft indie tunes.
Best For
This setup shines for a weekend stargazing sleepover, a birthday “camp under the stars,” or simply a chill evening when kids want a dreamy spot to read or chat. Its airy silhouette and gentle illumination keep the space feeling open yet intimate, perfect for kids who love a touch of magic without the clutter of bulky gear.
Pro tip: Secure the rope knots with a quick‑release carabiner so the hammock can be packed up in minutes for spontaneous backyard adventures.
3. Compact Pop-Up Bunk with Monochrome Stripes
When twilight settles and the backyard glows, the pop‑up bunk unfurls like a modern sculpture, its crisp black‑and‑white stripes turning the night into a playful runway for sibling duos.
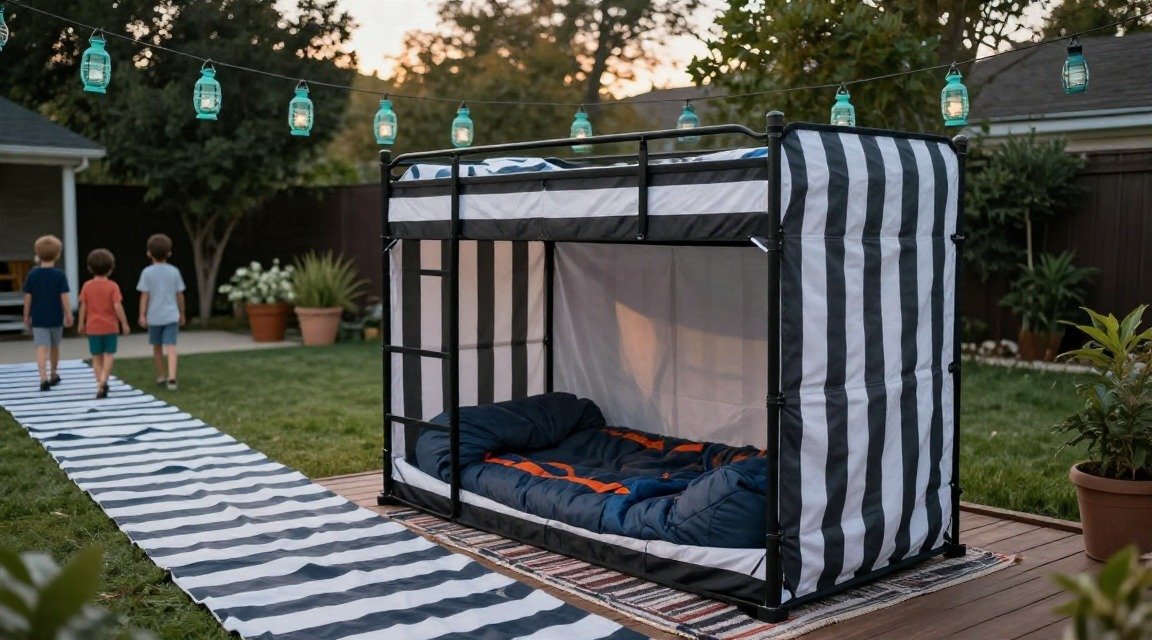
Best for: two kids, beginner‑level setup, small‑to‑medium backyard, weekend sleepover.
The vertical minimalist gear maximizes floor space, letting the kids lounge side‑by‑side while the striped canvas adds a bold, graphic punch. Pair the bunk with teal lanterns for a pop of color that feels both fresh and cozy.
Quick Assembly Steps
- Lay the folded frame on the ground and pull the built‑in spring arms outward.
- Clip the corner straps into the metal hooks that snap into place with a gentle click.
- Unfold the striped canvas, align the zippered seams, and pull the tension cords tight.
- Secure the base with the supplied sandbag clips to keep the bunk steady on uneven grass.
Color Play Tip
- Swap the teal lanterns for soft amber globes for a warmer vibe.
- Add a pastel‑colored throw pillow at the foot of the bunk to break up the monochrome.
- Stitch a thin, reflective tape along the stripe edges for a subtle glow when a flashlight sweeps across.
Budget Friendly Version
Choose a plain white canvas tarp and use painter’s tape to create your own black stripes—just measure, tape, and spray paint. Replace the branded sandbags with recycled sand‑filled zip‑pouch bags you can make from old laundry bags.
Pro tip: tuck a rolled-up blanket inside the bunk’s back panel; it doubles as a built‑in pillow and adds extra insulation for cooler nights.
4. Rustic Log-Style Sleeping Platform with Soft Wool Throws
A low, wooden platform that feels like a fallen log invites kids to nestle under a night‑sky canopy, while a chunky wool throw adds plush warmth. Scatter pine‑cone lanterns around the edges and the backyard instantly becomes a cozy forest clearing.
Best for: Nature‑loving kids, beginner DIYers, backyard sleepovers on a modest budget.
Materials List
Start with reclaimed pallet wood to mimic rustic logs, a sturdy pine frame, and a soft, natural‑fiber wool throw.
- Four reclaimed pallet boards (about 4 ft long each)
- 2×4 pine studs for the frame
- Chunky wool throw in a neutral earth tone
- Lanterns with battery‑operated LED candles
- Cluster of pine cones for décor
Supplies Checklist
You’ll also need a few simple tools and nature‑inspired accents.
- Measuring tape and pencil
- Hand saw or circular saw
- Drill with 2‑inch wood screws
- Sandpaper (medium grit)
- Exterior wood sealant (optional, for rain protection)
DIY Touches
Turn the plain boards into log‑like slabs and dress the platform with tactile details.
- Cut the pallet boards to equal lengths and sand the edges to a smooth finish.
- Attach the boards side‑by‑side on the pine frame, leaving a slight gap for a “log” rhythm.
- Apply a light coat of sealant, then lightly distress the wood with a hammer to reveal grain.
- Drape the wool throw over the center, tuck pine‑cone lanterns into the gaps, and place a few loose pine cones around the perimeter.
Who Will Love It
This rustic log‑style sleeping platform is perfect for kids who adore the outdoors, families looking for a low‑tech, minimalist gear setup, and anyone who wants a budget‑swap that feels high‑end. Pair it with a simple star‑projector pillow fort for an extra‑magical night‑time vibe.
5. Minimalist Star-Projector Pillow Fort
Picture a low‑key pillow fort that glows like a private planetarium, the soft hum of a sleek star projector turning the backyard night sky into a swirling galaxy right above your kids’ heads.
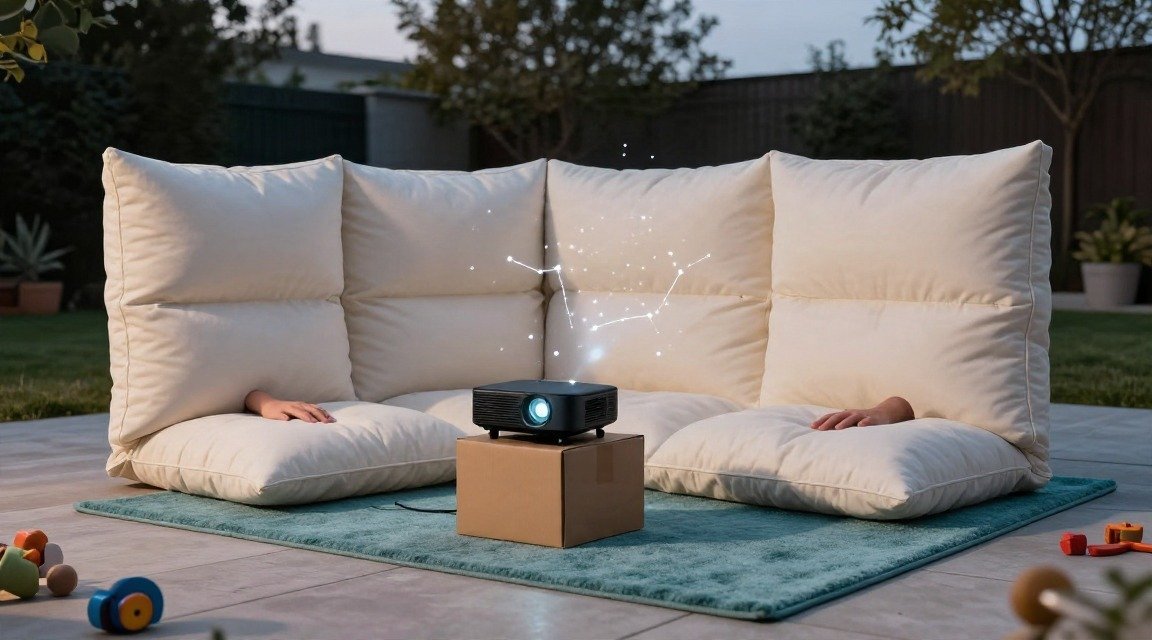
Best for: creative kids, beginner‑friendly, a backyard sleepover in a small patio or deck.
Setting Up the Projection
- A minimalist gear star projector (battery‑operated or plug‑in)
- A portable power strip or rechargeable pack
- A small tripod or sturdy cardboard box to raise the lens
- Place the tripod in the center of the fort’s floor space and secure the projector at eye level.
- Adjust the focus so the stars stretch across the ceiling of the fort, not the surrounding yard.
- Turn on the dim‑mood mode and set a gentle timer for 30‑minute “galaxy” sessions.
DIY tweak: Slip a piece of sheer white fabric over the projector’s lens for a softer, mist‑like glow.
Styling the Fort
- Oversized foam cushions in neutral tones (soft gray, muted cream)
- A chunky knit throw in a deep navy for contrast
- String lights with warm LED bulbs draped loosely over the top
Arrange the cushions in a semi‑circle, leaving a small gap for the projector’s beam. Tuck the throw over the back edge for a plush finish. For a budget swap, use reclaimed foam pillows from an old sofa and cover them with breathable cotton pillowcases you already have.
Pro tip: Keep a spare set of blackout curtains nearby; pulling them over the fort’s entrance intensifies the starry‑night vibe and blocks stray garden lights.
6. Eco-Friendly Recycled-Box Cabin with Chalkboard Walls
When twilight settles and solar lanterns cast a soft amber glow, the kids disappear into a cozy cabin stitched together from repurposed corrugated boxes, its one side a fresh chalkboard ready for midnight sketches.
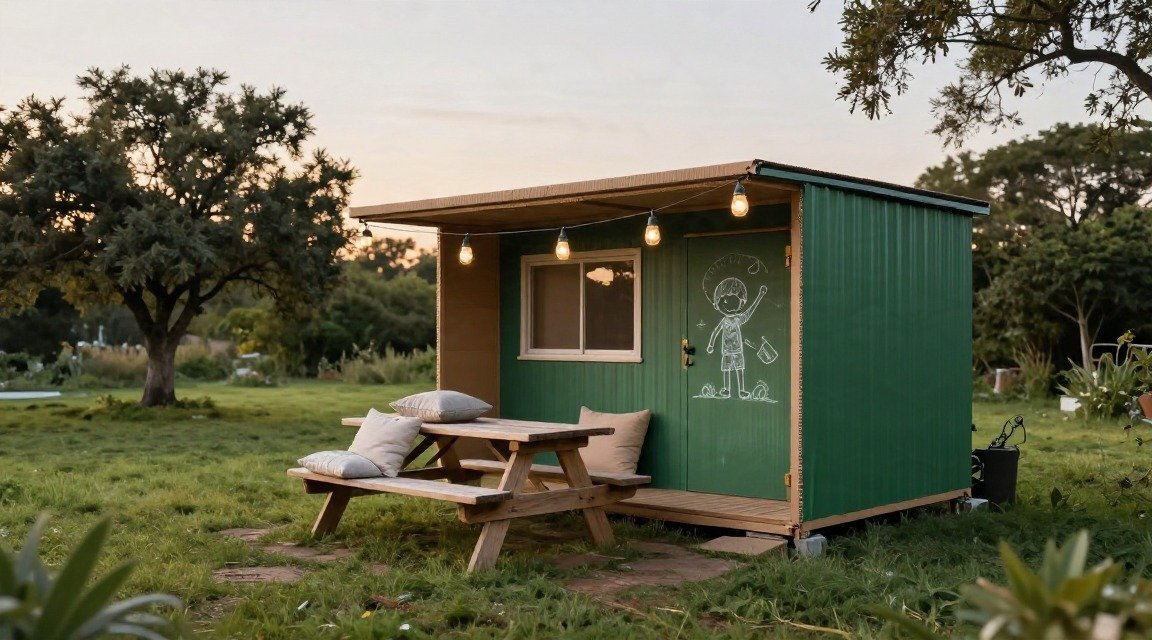
Best for: eco‑conscious families, beginner DIYers, Earth Day celebrations, and any backyard that can spare a modest footprint.
The cabin feels like a miniature log hut—neutral brown cardboard walls, a splash of chalkboard‑green on the front, and a roof of overlapping flaps that keep out the evening breeze. Light, portable, and fully recyclable, it invites imagination without clutter.
Construction Basics
Gather sturdy boxes, a box cutter, packing tape, and a sheet of matte chalkboard paint. A few solar‑powered lanterns finish the vibe.
- Three large moving boxes (approx. 18×12×12 in.)
- Box cutter or sturdy scissors
- Heavy‑duty packing tape
- Matte chalkboard paint (one can covers one side)
- Solar lanterns (clip‑on or stake‑in)
- Optional: fabric curtains for a door
- Cut the tops off two boxes to create side walls; leave one box whole for the back.
- Reinforce seams with tape, then tape the three pieces together into a cabin shape.
- Paint the front panel with chalkboard paint; let dry fully before use.
- Attach solar lanterns to the roof edges with zip ties, positioning them to spill light inside.
Creative Chalk Ideas
Turn the green wall into a nightly gallery—simple, changeable, and perfectly suited to a starry‑night vibe.
- Outline constellations with white chalk; let kids connect the dots with glow‑in‑the‑dark chalk for extra magic.
- Sketch a “campfire” scene that can be erased and redrawn each night.
- Write a rotating “adventure log” where each child adds a line about the day’s discoveries.
- Use stencils of leaves or animal tracks for quick, repeatable patterns.
- Swap chalk for a dry‑erase marker on a small section for a reusable “menu” of bedtime snacks.
Pro tip: keep a small cloth nearby to wipe the board clean—fresh starts are part of the fun.
7. Night-Sky Picnic Blanket Lounge with LED Floor Tiles
The backyard transforms into a cozy cinema as the navy blanket spreads like a midnight sky, while tiny LED tiles flicker like constellations beneath giggling explorers.
Best for: kids who love movie nights, beginner‑level setup, any sized patio or lawn.
Laying Out the Lounge
Start with a waterproof navy blanket—large enough to cover a small patio table or a cleared grass patch. It anchors the glow and protects against dew.
- Water‑resistant navy blanket (≈6 ft × 8 ft)
- Square LED floor tiles (battery‑operated, cool‑white or pastel hues)
- Assorted plush pillows (soft cotton or faux‑fur)
- Portable Bluetooth speaker
- Roll out the blanket, smoothing edges so the surface stays flat.
- Arrange LED tiles in a loose “constellation” pattern—think Orion’s belt or a simple diamond shape.
- Scatter pillows around the edges, creating a low‑rise seating nook.
- Place the speaker at one corner, set the volume low, and cue a family‑friendly soundtrack.
Budget swap: use solar garden lights in place of LED tiles for a free‑charging sparkle.
Lighting Tricks
To amplify the starry‑night vibe, dim the speaker’s LED display (if it has one) and pair the floor tiles with a soft glow from a string of fairy lights draped over a nearby fence.
- Turn tiles on just before dusk for a gradual fade‑in.
- Use a remote‑controlled dimmer to pulse the lights in time with a gentle soundtrack.
- Hide a small reflector behind the blanket to bounce extra light upward, giving the illusion of a deeper sky.
Pro tip: tuck a thin, reflective foil sheet under the blanket’s center; it catches the LED glow and spreads a subtle shimmer across the whole lounge.
Which Look Should You Try First?
A soft summer breeze lifts the twinkling lights as your kids settle into their backyard wonderland, and you feel that instant spark of adventure ready to unfold tonight.
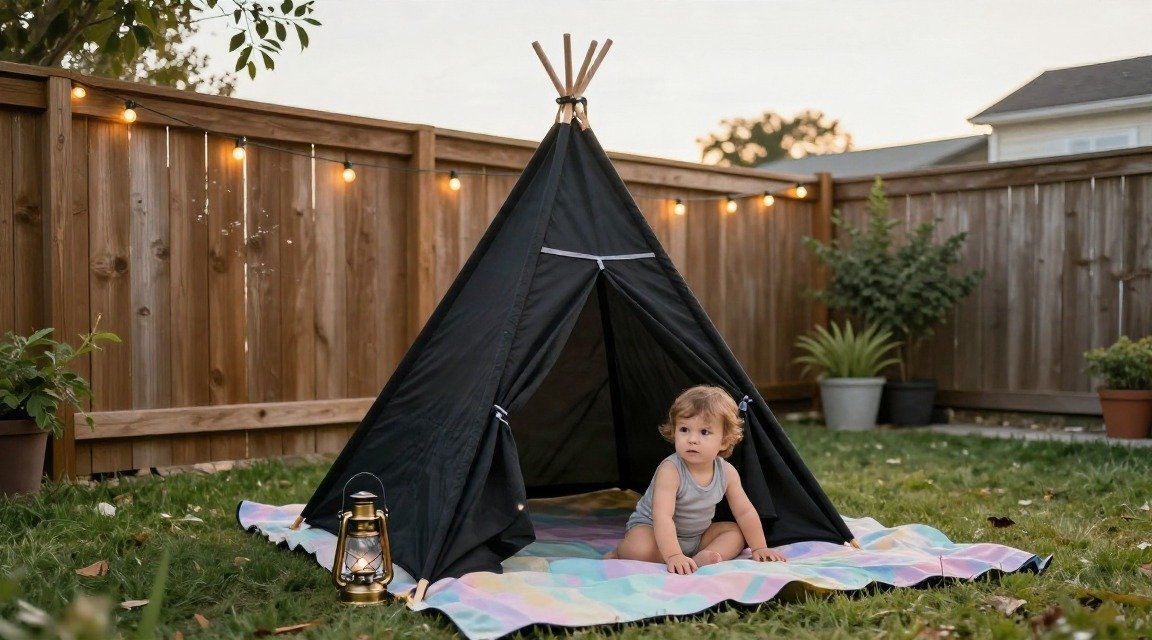
Best for: families choosing the perfect vibe for a given age, space, and energy level.
- Glow‑In‑The‑Dark Teepee Tent – ideal for toddlers to early‑elementary kids, works best in a modest‑sized yard where the tent can anchor to a low fence or garden post. The glow‑in‑the‑dark vibe fuels imagination without needing a lot of floor space.
- Sleek Canvas Hammock Nest – perfect for pre‑teens who crave a chill, airy lounge. Requires a sturdy pair of trees or a freestanding frame; the hammock’s airy feel suits larger backyards where you can stretch the canopy.
- Compact Pop‑Up Bunk with Monochrome Stripes – great for siblings close in age, especially when the yard is narrow. Its bold stripes add visual drama without overwhelming a small footprint.
- Rustic Log‑Style Sleeping Platform – a cozy, earthy option for older kids who love camping vibes. Needs a flat, level area and a few wooden planks; the platform feels grand in medium‑to‑large spaces.
- Minimalist Star‑Projector Pillow Fort – a magical, low‑effort setup for any age; perfect for tight corners or balcony‑style backyards where a full tent isn’t feasible.
- Eco‑Friendly Recycled‑Box Cabin – suits creative minds of any age, especially when you have a pile of sturdy cardboard boxes and a modest yard to arrange a whimsical “cabin village.”
- Night‑Sky Picnic Blanket Lounge – the ultimate illuminated lounge for families with a spacious lawn; the LED floor tiles create a star‑filled carpet that feels like a private galaxy.
Pick the look that feels most doable tonight, gather the key pieces, and watch the backyard transform into a storybook night in minutes.
